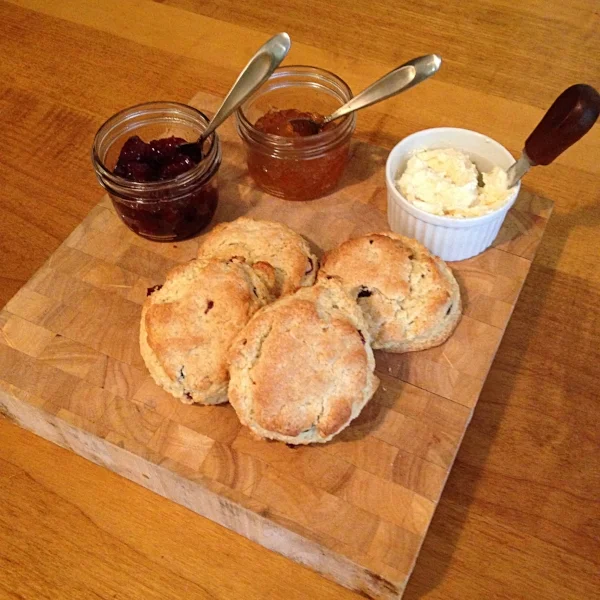
Pistachio and Currant Scones served with Cherry and Apricot Preserves and Clotted Cream. PC: John Cal
Ingredients:
4 c AP Flour
3 T Baking Powder
1.5 t Salt
2/3 c Sugar
1/2 c Butter - Cold
1/4 c Shortening - Also cold, if you remember.
1.5 c Heavy Cream - (But buy a pint, so you can use the remaining half cup for egg wash)
3 (2+1) Eggs
2-3 Hands full of tasty mix-ins (We’ll discuss this later.)
Method:
1. In a large mixing bowl dump in the All Purpose Flour, Baking Powder, Salt, and Sugar. Stir. Just use your hand. Don’t dirty a whisk or a spoon. It’s not necessary, and makes things more complicated.
2. Measure your cream out and set it aside. You don’t need it yet, but your hands are about to be dirty. And actually, it’ll be more efficient if you measure out a half cup in a small bowl, and just leave the cup and a half you need for the dough in the carton. It’ll make things easier to pour. Again, just set it all aside, because your hands… almost messy time.
If you’re worried about your hands being messy, then you should just stop baking, and head down to the coffee shop on the corner and get the scones there. Baking means things get dirty. Sorry. (#NotSorry)
3. Now, take your butter and use a bench scraper if you have one, or a butter knife, or whatever, to cut your butter into little cubes, maybe 1/2 inch thick. It doesn’t really matter, but you know, smallish. Then dump that into your bowl on top of the dry stuff.
Next, measure out your shortening. Dump shortening onto dry stuff. And YES, you must use shortening. Butter makes baked goods tasty and flakey. Shorting gives baked goods a soft tender texture. So the two work together to make a tasty and flakey, but tender baked good. You could also use lard if you’re into that sort of thing, but I’m guessing you aren’t.
Not that you're going to listen to me about the shortening thing, but whatever you do, please don’t use margarine or coconut oil. You COULD use all butter, I suppose, but your scones won’t end up as tender
Once, I went to Trader Joe’s and tried to buy shortening for this recipe. I couldn’t find it, and asked someone for help. Wherein, I felt the grocery worker’s immediate judgment as she tried to steer me toward coconut oil as a substitute. Thankfully, I didn’t cave, because my scones turned out delicious, and not coconutty.
4. Take your hands (this is where they start to get dirty), and use your finger tips to mash the butter and shortening into the flour, creating little flake like shapes. Do this till most (80% ish) of the small lumps of fat are incorporated into the dry mix. Leaving a few small lumps of fat is good for the texture of your scones. When you’re done, it’ll look sort of like instant oatmeal.
You could use a dough cutter, but then you’d have one more thing to wash, and your hands would get dirty eventually when you shape the scones anyway, so just get over yourself and use your hands. Using your hands will also help you to not over mix. Overmixing is what makes bad scones. Don’t do it. Stop before you think you need to. It’ll look like a mess. It should. If the mass of ingredients looks even and well incorporated and pretty, like it would make a good Instagram picture, you did it wrong. Start over, and don’t mix it as much next time.
This is also why we do it by hand instead of using a mixer, because mixers can more easily over mix things. Here, let me say it again, to help you remember, “Don’t over mix.”
5. Create a well (or a big hollowed out divot) in the middle of your fat/flour mix, and crack in two eggs (I think the brown ones are prettier, albeit more expensive these days. GAH! Marketing works!) Now, pour in most (not all) of your cup and a half of cream left in the carton, you know… most, like 87%. You’ll probably need it all, but if you live someplace super humid, you might not.
Okay, now that you have all these random ingredients together in the bowl, take your dominant hand, and create a claw shape, just like the claw shape made when singing ‘Bears’, the beloved ‘Slugs & Bugs’ song. Take said claw hand, and stick it into the midst of the mass of ingredients in the bowl, and go around 3-4 times. Then stop. Don’t over mix.
It should still look like a mess, and if this is the first time you’ve made scones, you’ll be feeling nervous right about now, like the impending doom of the world will never be righted, or like you were in the middle of a debate about Confederate statues.
5a. Let’s take a moment, and talk about mix-ins.
My favorite flavor combination for these scones is a mix of dried cherries and shelled pistachios. I prefer to use exactly 2 mix-ins when making scones, so that each of the flavors can shine through. I also like to pick two flavors that are complimentary, yes, but also are drastically different in either, texture, color, flavor, or all three — so tart and creamy, or crunchy and chewy, or soft and crunchy. Though, this specific recipe would not be a good candidate to add fresh or frozen fruit to, play around with your mixing and matching, and you’ll find some combos that tickle your fancy. Here are some of my favorites:
Diced Dried Apricots & Cashews
Candied Orange Peel & Pine Nuts
Dried Cherries & Pistachios
Dried Cranberries & White Chocolate
Gruyere & Fresh Thyme
Candied Grapefruit & Poppy Seeds
6. Now, into your barely mixed mass of ingredients toss in, 3ish hands full of your choice of mix-ins. I have no exacting measurement for you here, except to say that you shouldn’t be too greedy, more mix-ins don’t make a better scone. And if you have smaller hands, go ahead a throw in an extra handful.
7. Remake the claw shape with you hand. If you play guitar, the shape looks very similar to an open C chord. Stir around until the mix just comes together. JUST, JUST. Don’t over mix. There may still be a few bits of flour in the bottom, or maybe even a little streak of yolk or albumen not fully mixed in. Parts of the dough may even be wetter or drier than other parts. That’s okay.
That said, now that I hope you have the fear of over mixing in you, the dough should still hold together as one mass, and be mixed enough. Also, this is where you guess whether or not you should add the remaining cream if your dough seems too dry. Guess well, dear one.
8. Lightly flour your bench surface, and turn your mass of dough onto it. Resist the urge to need it more than it takes to get it to hold together.
Some people like to split the amount of dough in two here, but I’m a rebel and like to deal with it all at once.
Some people also like to use a rolling pin, to roll the dough out, but as I am lazy, and want one less thing to wash up, I just pat the dough down to about an inch and a half all over.
Cut out circular shapes (I usually use an 8 oz. jelly jar), and place 12 -15 on a half sized sheet pan lined with parchment paper, and stick the unbaked scones, pan and all, into the fridge to let the butter firm back up.
9. While your first batch of shaped scones is chilling, preheat your oven to 375 degrees Fahrenheit, and continue shaping what’s left of your scone dough. This recipe will make about 20 jelly jar sized-scones, though the number will vary depending on how greedy you are when incorporating mix-ins.
Chill the rest of your shaped scones till you’re ready to bake them, and because we didn’t use a mixer, or superfluous things like a dough cutter, you probably have enough time to clean up before your oven is preheated. (You’re welcome.)
Let’s also make some egg wash while we’re waiting for that oven. Take that 1/2 cup of cream you set aside, and beat in your remaining egg with a fork; or if you’re super lazy like me, I often just use the pastry brush I’m going to use to brush the egg wash on the scones. Or, if I don’t have a brush around, I’ve been known to just use my fingers and them finger paint the egg wash on like a plebe.
10. Once your oven is preheated, egg wash the top of each scone, and yes, the egg wash’s only purpose is to make the scone prettier; but you should still do it, because pretty things are nice sometimes.
Bake for 15-18 minutes, or until lightly browned on top. When done, let cool for a few minutes on a rack, as to not let the bottoms steam. And yes, you can wait. We’re not animals.